
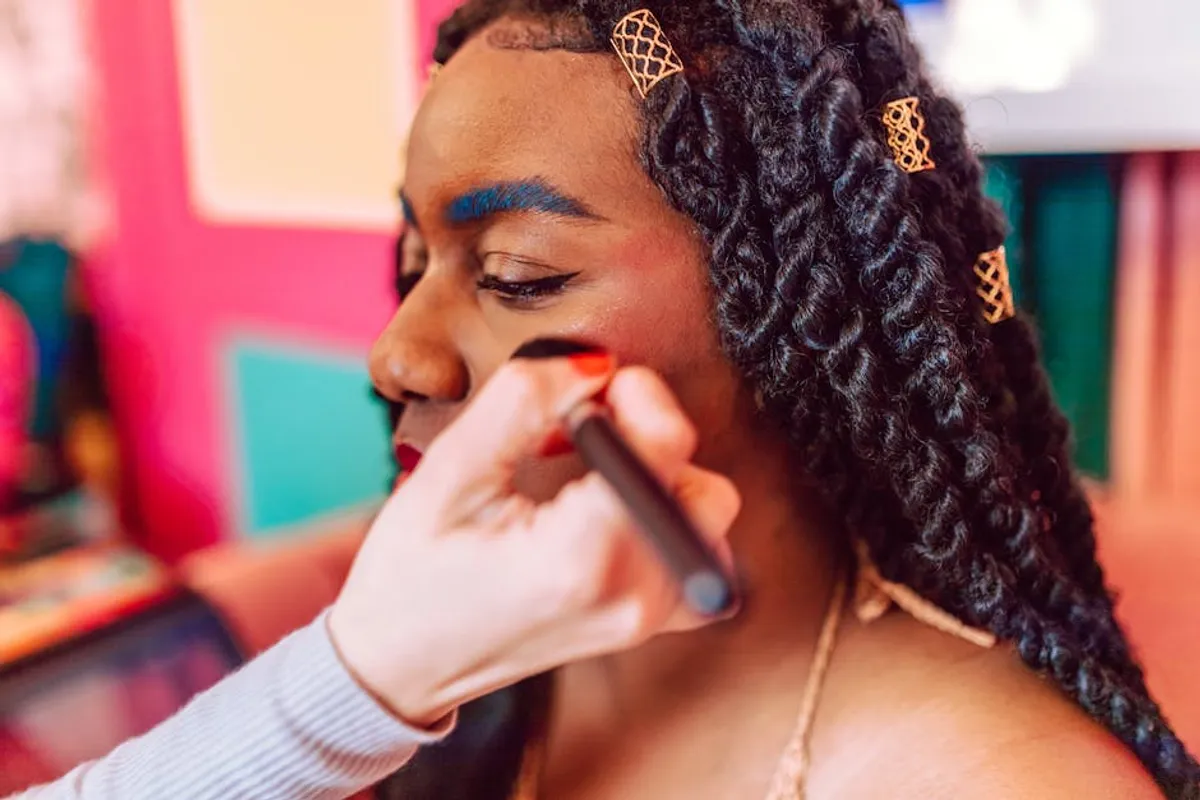
Achieving a polished, professional appearance in photographs is crucial for anyone whose image represents their brand, product, or service. Whether for corporate headshots, product launches, social media profiles, or editorial features, the right hair and makeup can significantly elevate the visual impact and convey the intended message. Conversely, overlooking these details can detract from an otherwise well-executed photo session, leading to images that appear flat, dated, or inconsistent with your brand identity. This guide provides actionable hair and makeup strategies specifically tailored for photographic capture, focusing on techniques that translate effectively from real life to two dimensions and withstand the scrutiny of high-resolution imaging.
Key Considerations for Photo Session Hair & Makeup
Before any product is applied, understanding the unique demands of photography is essential. Unlike everyday wear, camera lenses, lighting setups, and post-production processes can alter how hair and makeup appear. The goal is to create a look that provides structure, definition, and a healthy glow without appearing heavy or artificial on camera. This often means adjusting techniques, product choices, and color palettes to compensate for light absorption, flash reflection, and the flattening effect of lenses. Focus on longevity, seamless blending, and strategic enhancement to ensure your efforts translate into compelling photographic results.
1. Prioritize Skin Preparation
The foundation of any successful makeup application for photography is meticulously prepared skin. This isn't just about cleansing; it involves a multi-step routine designed to hydrate, smooth, and create an even canvas. Dehydrated or textured skin can appear dull or uneven under studio lights, requiring heavier makeup application that can look caked on. A thorough regimen typically includes gentle exfoliation to remove dead skin cells, followed by a hydrating serum and a lightweight, non-comedogenic moisturizer. Allowing these products to fully absorb before makeup application ensures better adherence and a more natural finish.
Best for: Achieving a radiant, smooth base for any skin type, minimizing the need for heavy foundation, and enhancing makeup longevity.
Pros:
- Creates an optimal surface for makeup, improving blendability and wear time.
- Reduces the appearance of fine lines, dry patches, and uneven texture.
- Contributes to a natural, healthy glow that translates well on camera.
- Minimizes post-production retouching efforts related to skin quality.
Cons:
- Requires advance planning; last-minute preparation may not yield full benefits.
- Incorrect product choices can lead to irritation or adverse reactions.
- Over-exfoliation can cause redness or sensitivity, especially for sensitive skin types.
Verdict: Non-negotiable for professional-looking photographs. Investing time in skin prep streamlines the entire makeup process and significantly enhances final image quality.
2. Opt for Matte or Satin Finishes
While dewy skin is popular in everyday trends, highly reflective or shimmery finishes can pose challenges in photography. Studio lighting, flash, and even natural sunlight can catch these reflective particles, creating unwanted hot spots or making the skin appear overly oily. Matte or satin foundations, powders, and eyeshadows absorb light rather than reflecting it, providing a more controlled and consistent appearance. This ensures that skin texture and facial contours are defined by light and shadow, not by distracting glares.
Best for: Controlling shine, ensuring consistent skin tone across various lighting conditions, and achieving a sophisticated, non-distracting finish.
Pros:
- Prevents unwanted shine and hot spots under bright lights.
- Provides a more uniform and polished look on camera.
- Enhances definition without relying on excessive shimmer.
- Often offers better longevity compared to dewy formulas.
Cons:
- Can sometimes appear flat if not balanced with strategic highlighting.
- May emphasize dry patches if skin preparation is inadequate.
- Requires careful selection to avoid a mask-like or overly dry appearance.
Verdict: Essential for photographic consistency and avoiding distracting reflections. Balance with subtle, non-shimmer highlights for dimension.
3. Strategic Contouring and Highlighting
The camera's lens can flatten facial features, reducing the natural depth and dimension of the face. Strategic contouring and highlighting are critical for restoring this three-dimensionality. Contour shades, typically two to three shades darker than your natural skin tone and with a cool undertone, should be applied to areas like the hollows of the cheeks, jawline, and temples to create shadows and recession. Highlighters, preferably matte or satin, applied to the high points of the face (cheekbones, brow bone, bridge of the nose, cupid's bow) bring these features forward. The key is seamless blending to avoid harsh lines, which are highly visible on camera.
Best for: Restoring facial dimension, defining features, and creating a sculpted look that translates well in two dimensions.
Pros:
- Adds depth and structure to the face, counteracting the flattening effect of photography.
- Enhances natural bone structure and facial angles.
- Allows for precise control over facial definition without heavy makeup.
- Can be customized to suit various face shapes and desired outcomes.
Cons:
- Requires practice and a nuanced understanding of light and shadow.
- Poor blending results in visible lines and an unnatural appearance.
- Using overly warm or shimmery contour/highlight products can look artificial.
Verdict: A powerful technique to add definition and structure, but demands a light hand and meticulous blending for a natural, camera-ready finish.
4. Define Brows Clearly
Eyebrows frame the face and are crucial for conveying expression and balance in photographs. Sparse or undefined brows can make the face appear less structured and expressions less impactful. For photo sessions, brows should be meticulously groomed, filled in where necessary, and defined with a pencil, powder, or pomade. The goal is a natural yet polished look, avoiding overly drawn or blocky brows. A clear brow gel can set them in place, ensuring they remain neat throughout the shoot.
Best for: Enhancing facial symmetry, framing the eyes, and adding structure and expressiveness to the face in photographs.
Pros:
- Creates a polished and complete look for the face.
- Helps to balance facial features and draw attention to the eyes.
- Adds depth and definition that is often lost under bright lights.
- Contributes to a more confident and articulate expression.
Cons:
- Over-filling or harsh lines can appear unnatural and distracting.
- Incorrect color matching can clash with hair color or skin tone.
- Requires precise application to achieve a symmetrical and balanced look.
Verdict: Well-defined brows are essential for a finished look, providing crucial facial structure and enhancing expressions in photographic contexts.
5. Emphasize Eye Definition
Eyes are often the focal point of a photograph. Without adequate definition, they can appear small or recede into the face, especially with bright studio lighting. Eyeliner, mascara, and subtle eyeshadow are key to bringing them forward. A thin line of dark eyeliner along the upper lash line, extending slightly at the outer corner, provides definition without being overtly dramatic. Ample mascara (waterproof is often preferred for longevity) opens up the eyes. Avoid excessive shimmer or glitter on the eyelids, which can create distracting reflections. Neutral, matte eyeshadows in varying depths add dimension without competing with the subject.
Best for: Making eyes appear larger, more expressive, and preventing them from looking washed out under bright lights.
Pros:
- Draws attention to the eyes, making them a focal point.
- Adds depth and intensity to the gaze.
- Helps eyes stand out against the rest of the face.
- Subtle application can create a natural yet impactful look.
Cons:
- Heavy application can look harsh or dated.
- Smudged eyeliner or mascara is highly visible and detracts from the image.
- Excessive shimmer can create unwanted glare or reflections.
Verdict: Crucial for impactful portraits. Focus on clean lines, defined lashes, and subtle shading to ensure eyes are prominent and expressive.
6. Choose Long-Wear Formulas
Photo sessions can be lengthy, involving multiple setups, wardrobe changes, and varying temperatures. Makeup needs to withstand these conditions without smudging, fading, or creasing. Opt for long-wear foundations, concealers, eyeliners, and lip products. Waterproof mascara and setting sprays are invaluable for ensuring makeup stays put. These formulas are designed to adhere better to the skin and resist transfer, minimizing the need for constant touch-ups and ensuring a consistent look throughout the shoot.
Best for: Maintaining a fresh, consistent look throughout extended photo sessions and minimizing the need for constant reapplication.
Pros:
- Ensures makeup remains intact and flawless for hours.
- Reduces stress about makeup degradation during the shoot.
- Minimizes downtime for touch-ups, maximizing shooting time.
- Provides confidence that the look will hold up under various conditions.
Cons:
- Some long-wear formulas can feel heavier on the skin.
- May require specific removers for effective cleansing.
- Certain formulations might be less suitable for very sensitive skin.
Verdict: A practical necessity for professional photo shoots, ensuring makeup integrity and reducing logistical concerns.
7. Avoid SPF in Face Makeup
While SPF is crucial for daily skin protection, many chemical sunscreens contain ingredients like zinc oxide or titanium dioxide that can cause a phenomenon known as "flashback" in photographs. These ingredients reflect light, creating a white or ghostly cast on the face when a flash is used, making the skin appear significantly lighter than the body. For photo sessions, especially those involving flash photography, it's best to use foundations and concealers that are SPF-free or contain very low levels of physical sunscreen ingredients. If sun protection is absolutely necessary, opt for a chemical SPF applied well in advance, and test its flashback properties.
Best for: Preventing a white cast or ghostly appearance on the face in flash photography, ensuring accurate skin tone representation.
Pros:
- Eliminates the risk of flashback, ensuring consistent skin tone.
- Allows for accurate color rendition of makeup and skin.
- Avoids the need for extensive post-production correction for flashback.
Cons:
- Sacrifices sun protection during the shoot if performed outdoors.
- Requires a separate set of makeup products for photo days versus daily wear.
- Some products labeled "SPF-free" may still contain minimal reflective ingredients.
Verdict: A critical consideration for flash photography; prioritize SPF-free face makeup to avoid undesirable flashback effects.
8. Consider Hair Texture Over Volume
For hair, the camera often emphasizes texture and definition more effectively than sheer volume. While a voluminous blowout might look impressive in person, it can sometimes appear flat or unruly in photographs, especially if the hair lacks distinct texture. Instead, focus on creating defined waves, polished curls, or sleek straight styles that have visible movement and separation. Using texturizing sprays, light-hold hairsprays, and serums for shine can enhance these elements. Ensure hair is clean, well-conditioned, and free of flyaways, which can become highly visible under studio lights.
Best for: Creating visually interesting and well-defined hair that holds its shape and appears polished in photographs.
Pros:
- Adds visual interest and dynamism to hair in still images.
- Ensures hair looks intentional and well-groomed.
- Helps hair maintain its style throughout the duration of the shoot.
- Minimizes the appearance of frizz and flyaways.
Cons:
- Over-styling can make hair appear stiff or unnatural.
- Requires appropriate styling tools and products for desired texture.
- Some textures may not suit all hair types without significant effort.
Verdict: Prioritize defined texture and polished finishes for hair to ensure it contributes positively to the overall photographic composition.
9. Pack a Touch-Up Kit
Even with long-wear formulas, a photo session environment can necessitate minor adjustments. A compact touch-up kit is indispensable. This should include blotting papers to absorb excess oil without disturbing makeup, a compact powder for shine control, lip product for reapplication, and perhaps a small brush for minor adjustments. Hairpins, a small comb, and a travel-size hairspray can address flyaways or slight shifts in hairstyle. Having these items readily available ensures quick fixes without delaying the shoot or compromising the final look.
Best for: Maintaining a fresh and consistent appearance throughout the entire photo session, addressing minor issues promptly.
Pros:
- Allows for immediate correction of shine, fading, or smudges.
- Ensures continuity of the look across different shots and setups.
- Provides peace of mind that minor issues can be resolved quickly.
- Prevents small imperfections from escalating into larger problems.
Cons:
- Requires remembering to pack and organize essential items.
- Over-touching can sometimes lead to a heavier makeup application.
- May not be sufficient for major makeup or hair issues.
Verdict: A fundamental tool for preserving makeup and hair integrity, ensuring a consistently polished look from start to finish.
10. Consult with Your Photographer
Before the shoot, a brief discussion with your photographer about the desired aesthetic, lighting conditions, and specific shots is invaluable. They can offer insights into what works best with their equipment and style. For instance, a high-key, brightly lit shoot might require slightly more definition in makeup, while a moody, low-key setup might benefit from softer contours. Understanding the wardrobe choices and overall theme also helps in aligning hair and makeup to create a cohesive visual story.
Best for: Ensuring hair and makeup choices align perfectly with the photographic vision, lighting, and overall aesthetic of the shoot.
Pros:
- Guarantees a cohesive look that complements the photographic style.
- Leverages the photographer's expertise in how makeup and hair translate on camera.
- Avoids potential clashes between the look and the photographic outcome.
- Facilitates a smoother and more efficient shooting process.
Cons:
- Requires proactive communication and planning prior to the shoot day.
- Photographers may have varying levels of expertise in makeup/hair advice.
- May require adjustments to initial hair/makeup plans.
Verdict: Essential for a harmonized outcome; direct communication with the photographer informs optimal hair and makeup decisions.
11. Consider Professional Assistance
For high-stakes photo sessions, engaging a professional hair and makeup artist (HMUA) is often the most reliable approach. An experienced HMUA understands how products and techniques react to different lighting, camera sensors, and post-production processes. They can create looks that are specifically designed for photographic longevity and impact, often using specialized products and tools. Their expertise extends to skin preparation, color correction, and ensuring continuity across multiple looks or days of shooting, significantly reducing stress and enhancing the final image quality.
Best for: Critical photo sessions where flawless, consistent, and camera-optimized results are paramount, such as corporate branding, editorial, or advertising campaigns.
Pros:
- Guarantees a professional, camera-ready look tailored to specific photographic needs.
- Reduces stress and allows the subject to focus on their performance.
- Access to specialized products and techniques for optimal photographic results.
- Ensures consistency and longevity of the look throughout the shoot.
Cons:
- Involves an additional cost, which may not fit all budgets.
- Requires vetting and booking a qualified professional in advance.
- Less control over the specific products used unless discussed beforehand.
Verdict: A valuable investment for critical projects, providing expert application and peace of mind that the look will translate perfectly on camera.
12. Practice and Test Your Look
Never debut a completely new hair or makeup look on the day of a significant photo session. It is crucial to practice the intended look beforehand, ideally taking test photos with similar lighting conditions to those anticipated for the actual shoot. This allows you to identify any issues like flashback, unwanted shine, or colors that appear differently on camera. It also provides an opportunity to refine techniques, adjust product choices, and ensure comfort with the final appearance, preventing last-minute surprises or dissatisfaction.
Best for: Eliminating uncertainty, refining techniques, and ensuring the chosen hair and makeup translate effectively into photographs before the actual session.
Pros:
- Identifies potential issues (e.g., flashback, color distortion) before the main shoot.
- Allows for adjustments to products, techniques, or styling.
- Builds confidence and comfort with the chosen look.
- Reduces stress and saves time on the day of the shoot.
Cons:
- Requires additional time and effort for preparation.
- May involve purchasing extra products for testing.
- Can be challenging to replicate exact studio lighting conditions at home.
Verdict: An indispensable step for ensuring a flawless outcome, practice and testing mitigate risks and confirm the camera-readiness of your chosen aesthetic.
Maximizing Your Photo Session Results
Implementing these hair and makeup strategies is not merely about aesthetics; it's about optimizing your visual communication. Each tip contributes to creating an image that is clear, professional, and aligned with your objectives. When evaluating your choices, consider the purpose of the photographs: are they for a corporate annual report, a personal branding website, or an e-commerce product launch? The context dictates the level of polish and the specific emphasis required. For instance, a natural, approachable look might suit a lifestyle brand, while a highly structured, bold appearance could be perfect for a high-fashion editorial. Always aim for consistency across all images within a series, ensuring that your hair and makeup choices support the overarching narrative and brand identity. Post-session, review the raw images with a critical eye, noting what worked well and what could be refined for future shoots. This iterative process allows for continuous improvement in your photographic presentation.
Frequently Asked Questions
Q: Should I do my own hair and makeup or hire a professional?
A: For high-stakes or critical photo sessions (e.g., professional headshots, brand campaigns), hiring a professional hair and makeup artist is highly recommended. They possess specialized skills and products to ensure a camera-ready, long-lasting look. For less formal shoots, or if you are skilled, doing it yourself is an option, provided you practice and test the look beforehand.
Q: How far in advance should I plan my hair and makeup?
A: Start planning at least 1-2 weeks in advance. This allows time for any necessary skin prep, hair treatments, product purchases, and crucial test runs of your chosen look. If hiring a professional, book them well in advance to secure their availability.
Q: What makeup colors work best for photos?
A: Generally, neutral tones (browns, grays, soft peaches, muted pinks) tend to photograph well and provide a timeless look. Avoid overly bright or trendy colors unless they are specifically part of your brand's aesthetic. Matte or satin finishes are preferred over highly shimmery ones to prevent glare.
Q: Can I wear SPF in my makeup for an outdoor photo shoot?
A: It's generally best to avoid SPF in your face makeup, even for outdoor shoots, if flash photography will be used. SPF ingredients like zinc oxide and titanium dioxide can cause a white cast or "flashback." If sun protection is critical, use a non-flash-friendly chemical SPF applied well in advance, or rely on hats and shade, and discuss with your photographer.
Q: How do I prevent my hair from getting frizzy during an outdoor shoot?
A: Use anti-frizz serums or creams during styling. Finish with a flexible-hold hairspray. If humidity is a major concern, consider styles that are less prone to frizz, such as sleek updos or braided looks. A touch-up kit with hairspray and a comb is essential.